Publishing oXygen XML project to GitHub Pages
Prerequisites
Before starting, make sure you have the following:
- oXygen XML Editor
- DITA project created in oXygen
- GitHub Account
- GitHub Desktop installed
- empty GitHub repository created for this project
Prepare Your DITA Project
- Open your DITA project in oXygen XML Editor.
- Create a .ditamap file for your project if it doesn’t exist yet.
- Make sure all output files are saved within the /docs subfolder your local GitHub repository folder.
Note:
Don’t save your output files directly in the main repository folder!
Create a Transformation Scenario
- In the Transformation Scenarios right bottom panel, click the plus (+) button.
- Select DITA-OT Transformation from the dropdown.
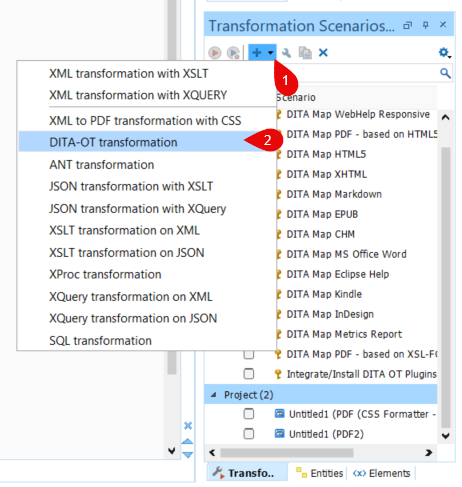
- In the dialogue that appears, choose WebHelp Responsive.
- Name your scenario and select a template under the Templates tab.
- Under the Output tab:
- Choose an output directory within your local GitHub repository (e.g., yourrepositoryname/docs) to ensure compatibility with GitHub Pages.
- Ensure the Temporary files directory is different from the Output directory.
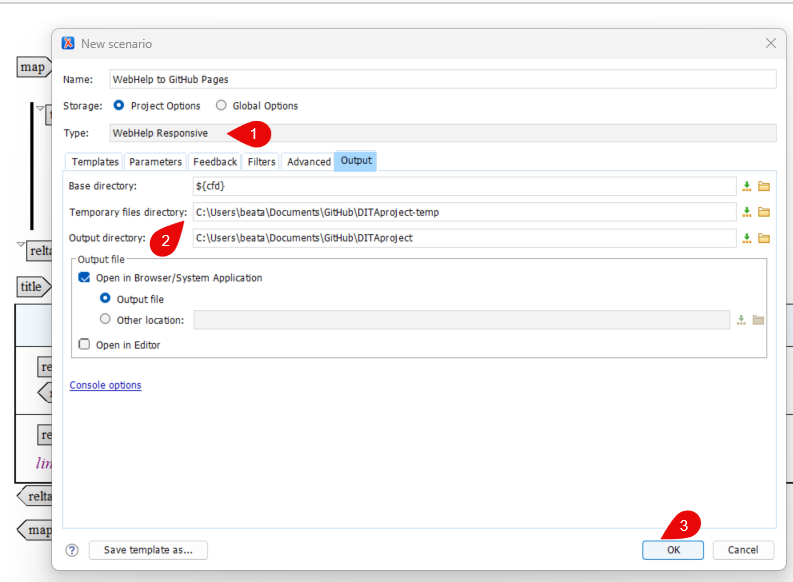
- Click OK to save your scenario.
Generating the WebHelp Output
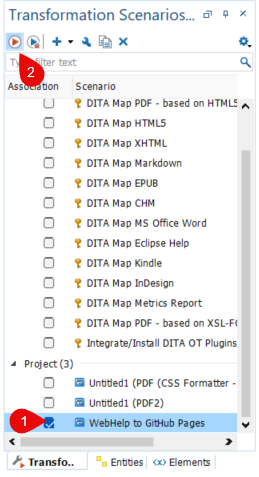
- Select the transformation scenario you have just created in the Transformation Scenarios panel.
- Click the Apply Transformation Scenario button (red triangle icon).
oXygen XML will generate a WebHelp Responsive website in the specified output folder.
Reviewing and Preparing Your Project for Publishing
- Open the output folder and confirm that all files were generated successfully.
- Launch GitHub Desktop.
- In the Changes tab, review the file modifications.
- Enter a commit summary (e.g., “Add WebHelp output for publishing”).
- Click Commit to main (or your current working branch).
- Click Push origin to upload the changes to your GitHub repository.
Enabling GitHub Pages
- Open your repository on Github.com.
- Navigate to the Settings tab.
- In the left sidebar, select Pages.
- Under Source, configure the following settings:
- Branch: main (or your current working branch),
- Folder: /docs.
- Click Save.
GitHub will build and publish your documentation automatically. Once the publication process is completed, a link to your live GitHub Pages site will appear on the same page.
- Visit the link to your GitHub Pages site to view your published oXygen XML content.