Guide to Publishing from MadCap Flare to GitHub Pages
Prerequisites
Before starting, make sure you have:
- installed MadCap Flare HTML
- created a MadCap Flare project and configured a HTML5 output
- set up an empty GitHub repository
Binding a GitHub repository to your MadCap project
- Copy the link of your empty GitHub repository.
- Open your MadCap Flare project.
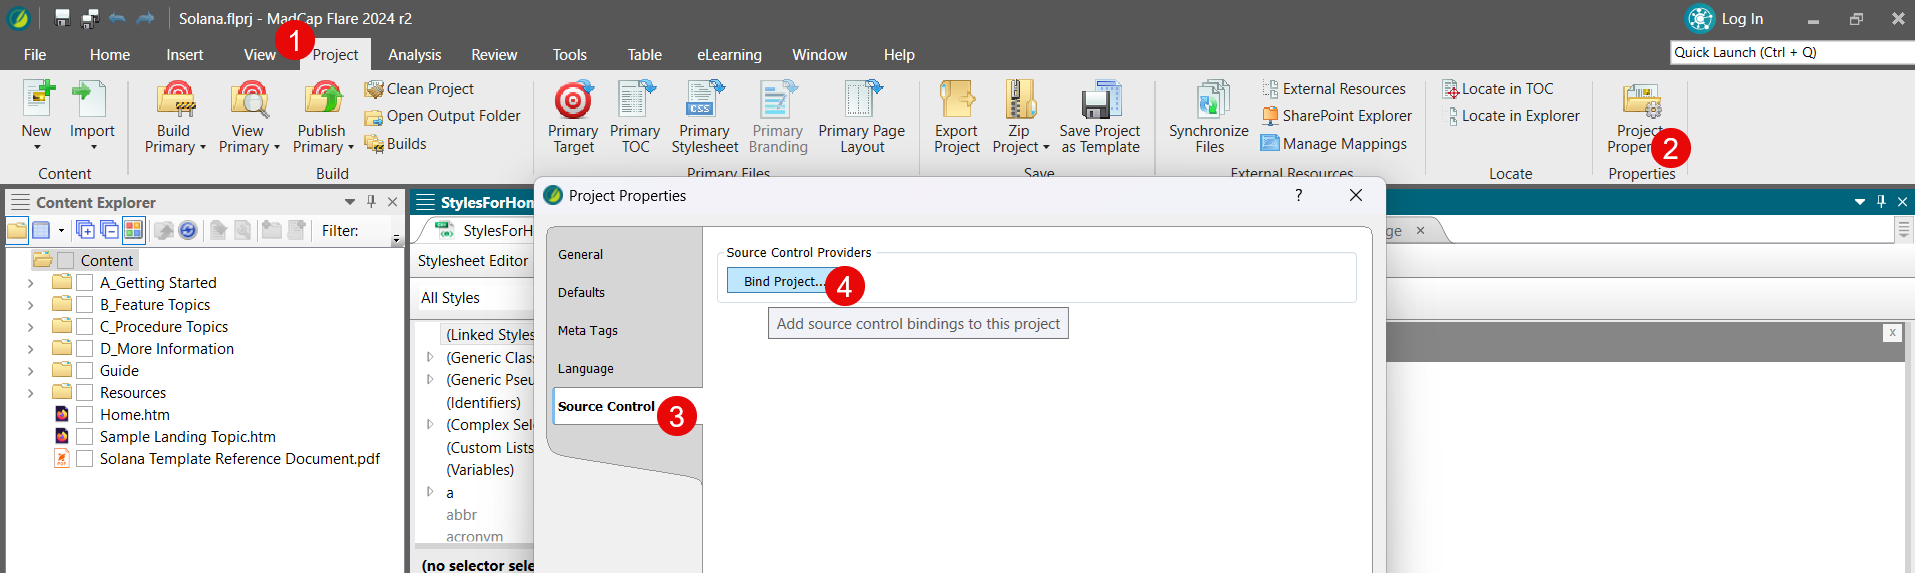
- In the MadCap Flare main window, navigate to Project > Project Properties > Source Control > Bind Project.
- In the dialog window that opened:
- set the Source Control Provider to Git,
- select the Remote repository and Push on bind checkboxes,
- paste the link of your GitHub repository,
- enter your GitHub username and the email address associated with your GitHub account
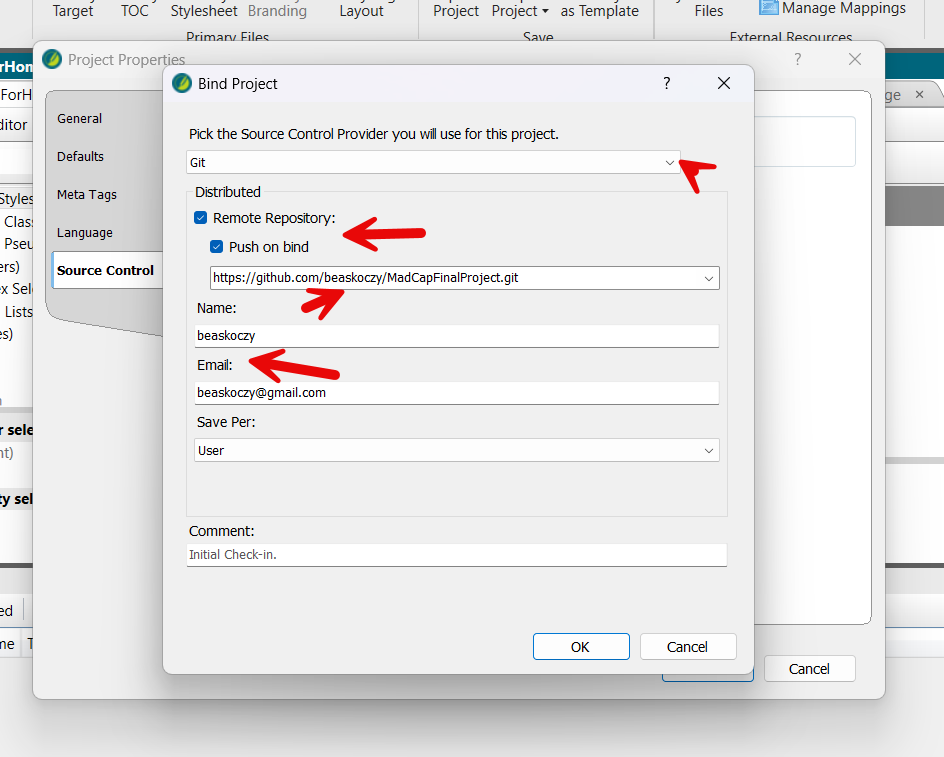
- Click OK to bind the project to your repository.
Configuring Your Project for GitHub Pages
- In the Project Organizer pane on the left side, go to Project > Target.
- Open your HTML5 target, or create a new one.
- In the General tab, change the Output file to index.html.

- Save your changes to the Output file.
Creating a Publishing Destination
- In the HTML5 Output file, click the Publishing tab on your left.
- Click New Destination.
- Change the name of your destination (optional) and click Add.
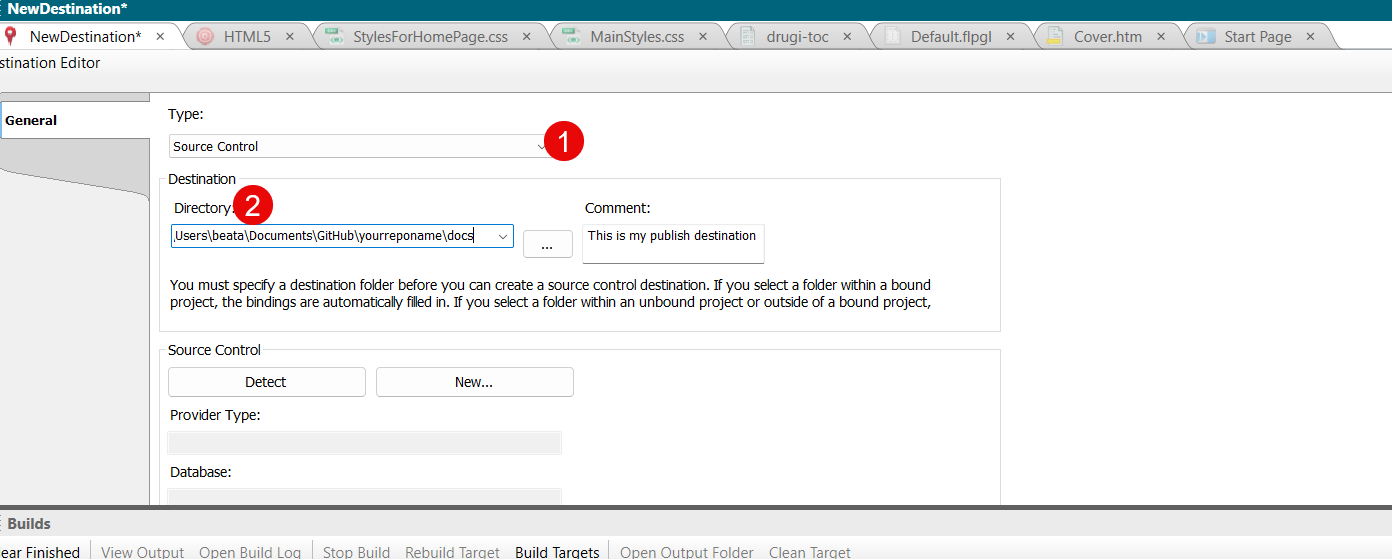
- In the window that appeared, set Destination Type to Source Control.
- In the Destination section, enter the local directory of your cloned GitHub Depository and add \docs at the end (e.g. X:\Users\You\Documents\Github\yourrepository\docs).
- Save the changes to your destination.
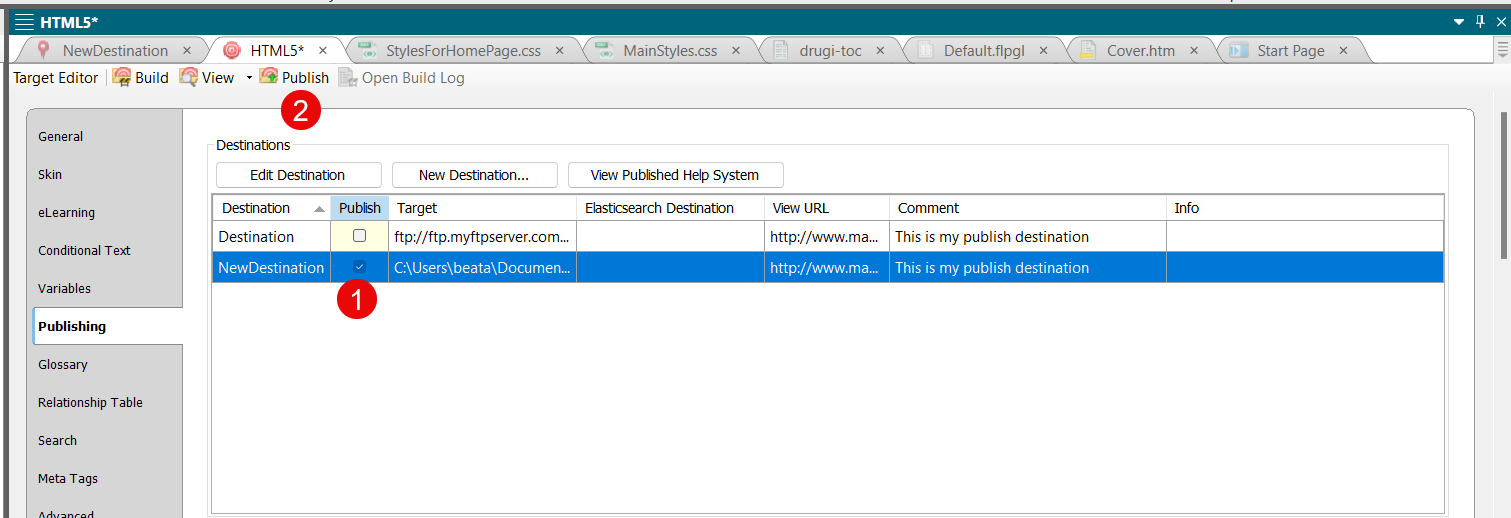
- In the Publishing tab of your HTML5 Output file, check the Publish box next to the destination you created.
- Click Publish to transfer your output files to the directory.
Setting up GitHub Pages
- Open your GitHub repository in a browser and go to Settings.
- Navigate to Pages > Build and development.
- In the Source section, choose Deploy from a branch.
- In the Branch section, choose main (or other working branch) and /docs.
- Click Save.
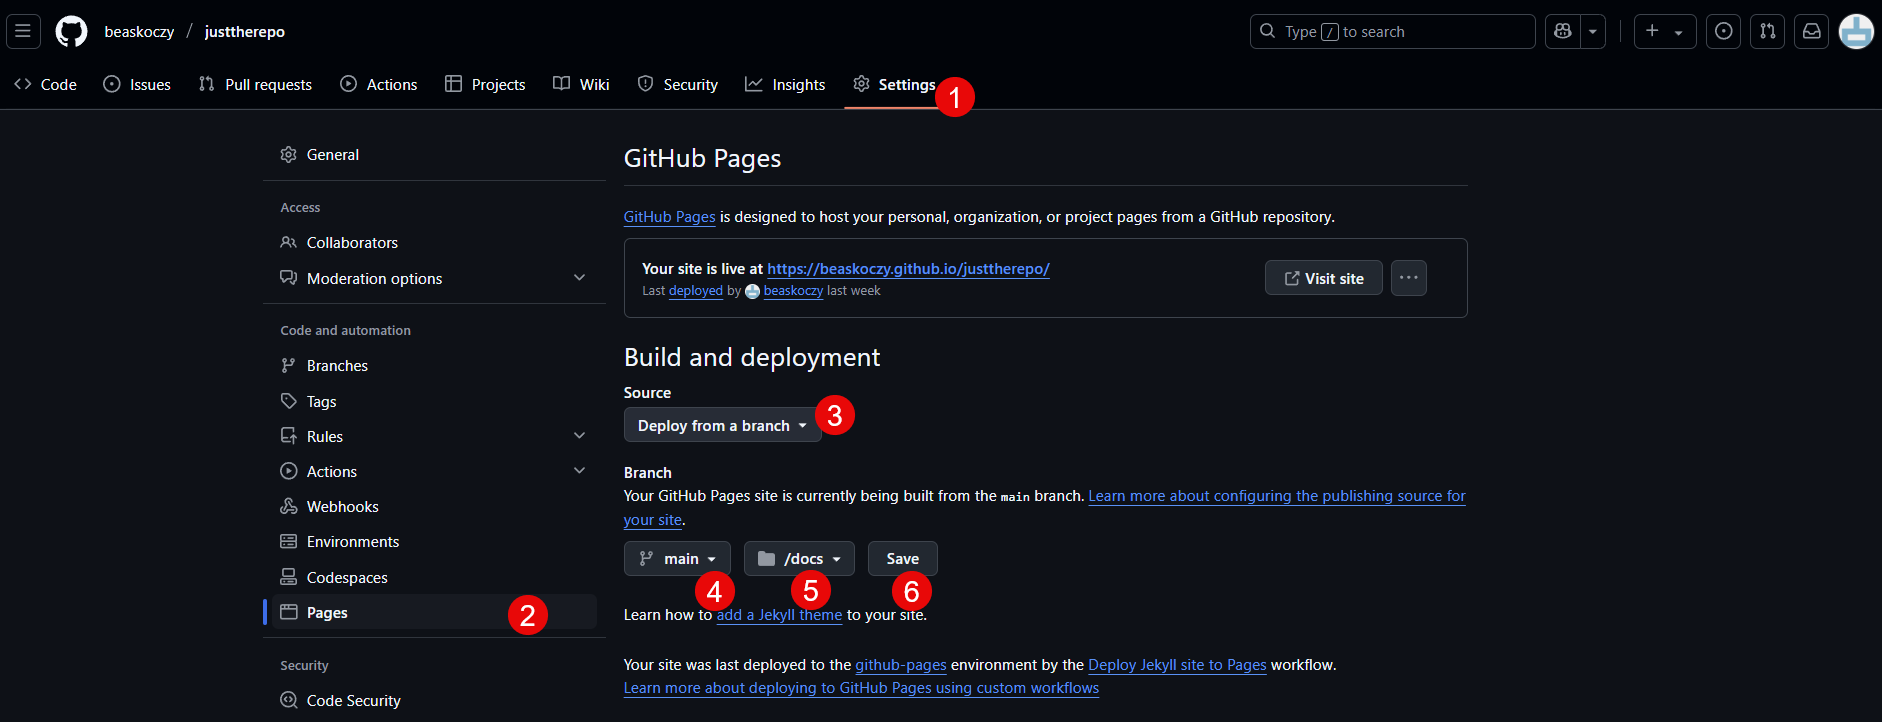
- After a few moments, your MadCap Flare project should be available at the standard GitHub Pages URL.
Updating Your MadCap Flare Documentation
- Open your project in MadCap Flare and make all the necessary updates to content.
- Navigate to Publish Primary > HTML5 output.
- Wait for the publishing process to complete.
- Your updates will appear automatically on your GitHub Pages site.